How To Integrate WooCommerce In WordPress Website
Posted on Sep, 3, 2019 I EliseIf you are developer or knew little bit about development, you might have noticed that several websites have been created on WordPress. It is the most common and easy platform for a user to establish an online store or e-commerce website. You need to modify the appearance according to your wish. But for integration of cart, shopping and checkout a modifier must attach woo-commerce plugin in this website.
What is WooCommerce?
WooCommerce is an open-source WordPress plugin that works to manage eCommerce for both small and large size online businesses. WooCommerce offers a variety of features, including payment, shipment, product variability, and WooCommerce email customizer.
In this article, we will guide you on how to integrate WooCommerce into your WordPress website. But first, let’s see why choose WooCommerce?
Why choose WooCommerce?
- Ensures security:
Ensures data protection and prevents your confidential information of transactions to leak out to third party forums.
- Built for WordPress:
Offers seamless integration with WP and enables a user to connect with millions of visitors.
- Well-documented:
Comprehensive documentation provides a broad aspect of SSL, snippets, theming, and much more.
- Scalable with your needs:
WooCommerce can ride the wave with your business to grow as per your needs.
- An array of free & paid extensions:
Offers you with unlimited free and paid extensions, you can customize your plugin with a wide range of integrated features.
- Audited by Sucuri:
Sucuri ensures that WooCommerce maintains coding standards and follow WordPress’s best practices.
- An ever-growing global community:
Considering the exponentially growing WordPress community, WooCommerce connects you to potential contributors.
Considering the benefits offered by WooCommerce, we are now starting the stepwise guide on how to integrate WooCommerce into your WordPress website. Let’s find out!
Step 1 – Installing & Activating WooCommerce
WooCommerce is a free plugin that can be installed from WordPress’s plugin inventory.
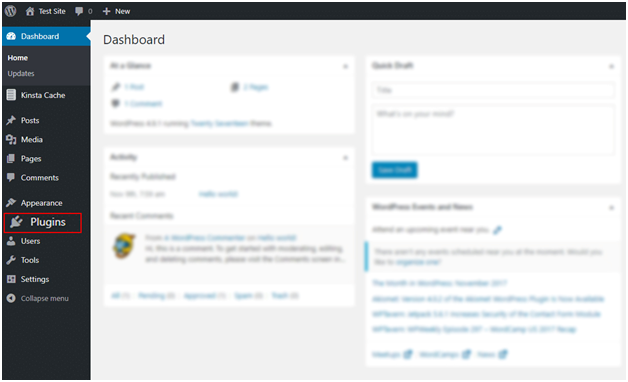
a) Login to your WordPress admin page and select Plugin option from the left side menu.
b) Press Add New option and type WooCommerce in the search bar.
c) As you find WooCommerce in search results, press ‘Install Now’ and install it.

Once the installation is complete, click Activate button.

Step 2 – Setting Up WooCommerce
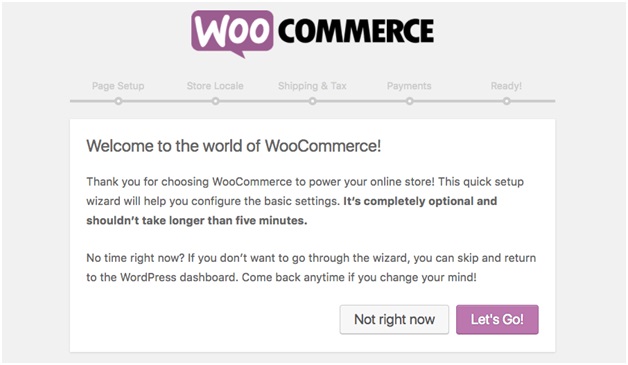
After installation, you will receive a welcome message with a Setup Wizard run link. Hence, press the button to start setting up your plugin. Also, you may get a welcome message having a ‘Lets Go’ button that will take you to the same page.
- Page setup
Here you can create and set up your main pages for your online store, including product display, shop cart, my account, and checkout. These pages are mandatory for WooCommerce to function correctly. After setting up, click ‘Continue’ button for the next step.

- Store Locate
Here you can set store location, weight, currency, and other tangible measurements that suit your business then press ‘Continue’.

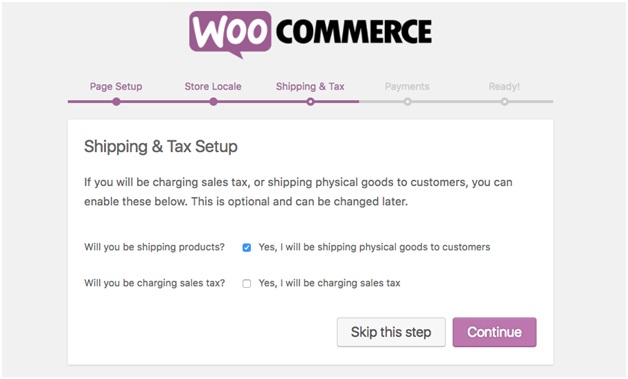
- Shipping & Tax
If you are dealing in virtual items, then disable this option or else configure for shipping and taxation.Now click the ‘Continue’ button again.
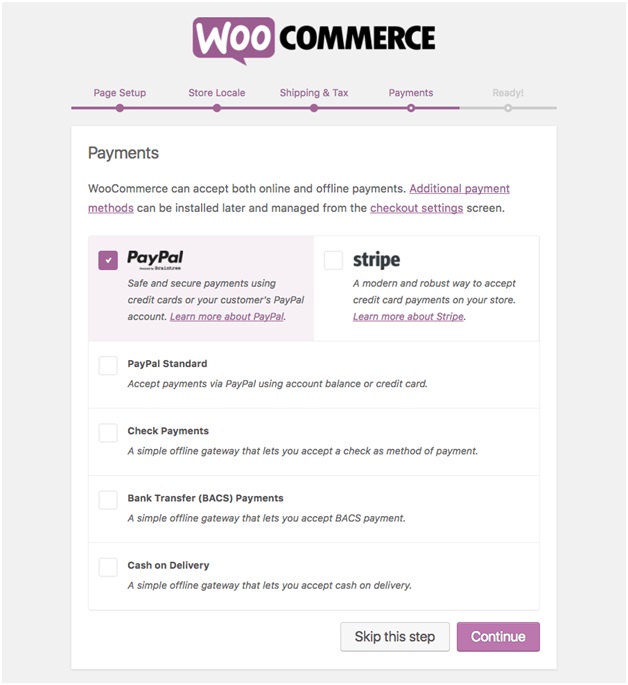
- Payments
Set your desired payment gateway method that you want to work with. PayPal, Payoneer, and Visa are some reliable options. Add methods manually and continue to next step.
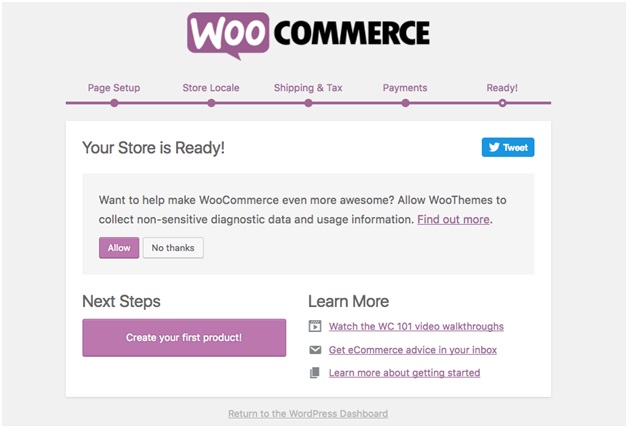
- Ready!
Congratulations, you have finished with setting up WooCommerce for your eCommerce WordPress site. You can now add and create your first product. To start with adding it, go to WP dashboard and start adding.
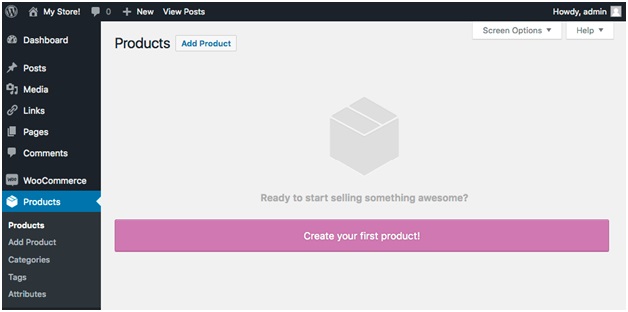
Step 3 – Adding & Managing Products
- Adding Products
Before adding your products and services that you are offering, it is essential to begin with the basics of product definitions of WooCommerce and understand to insert details accordingly.
- Product category helps you to place your products in groups of similar characteristics. Like, bottom wear, nightwear, t-shirts, blazer, etc. This also helps your customer to locate the product instantly. You can create unlimited categories and edit them anytime easily.
- Product attributes enable users to filter products according to color, size, fabric, and other dimensions. They can let the user select the desired product without wasting time. Attributes can be assigned to products independently or can set up a universal attribute for the entire website.
- Product data is the section where you can customize your product type accordingly. It gets you a drop-down menu to start with simple, grouped, or variable.

- The General section asks you to set the price of your product. You can also set a discount price or a promotional deal with a scheduled sale date.
- Inventory section provides you with the Stock Keeping Unit (SKU) details. In stock and out of stock details can be seen here for an individual product.
- Shipping page deals with logistics and provides you with weight and other dimensions to ship your goods.
- The advanced section helps you to create purchase notes and reviews for both seller and buyer. Menu orders can be specified and customized here.
Hence, after setting up with products press Publish button and check for the product page before continuing.

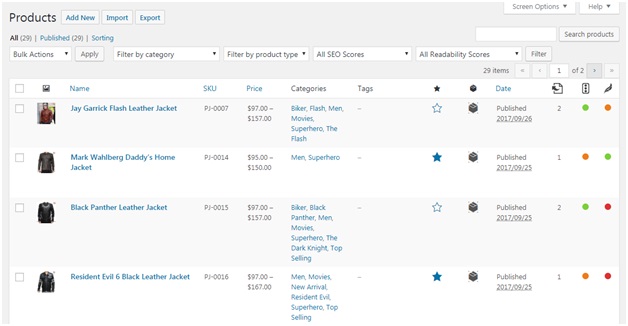
- Managing Products
After adding all of your products, you can edit, duplicate, delete, or feature a product as per your strategy. You can also apply bulk actions by selecting multiple products. A Star button is placed to feature or highlight a product in a category or on the main page while your deleted products are moved to Trash to hover it over.
Step 4 – Managing WooCommerce
- Managing Orders
After managing your product pages and publishing them successfully, it’s time to get orders! An order is created whenever a customer completes a checkout. You will get a notification in the left side menu of Orders. WooCommerce generates a unique order ID for every order with several details. It enables you to easily update order details with just a single click by notifying the customer as well.

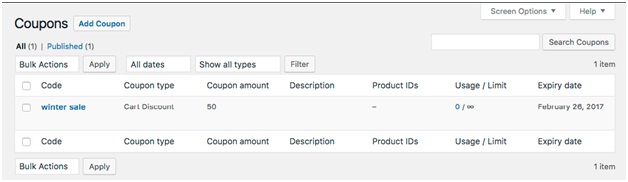
- Managing Coupons
“Discount coupons are an ideal way to promote your goods” says; Shaun Kent, Australian Master. WooCommerce enables you to view used and balance coupons with editing and scheduling options. Add, edit, or disable token with just a click on your site.
- Managing Reports
Report section shows you how your ecommerce is performing. You can customize your reports to analyze day wise, week wise, month wise, or even by a sales or promotional period to check for growth. Just select your specifications and press Generate button to a detailed analysis.

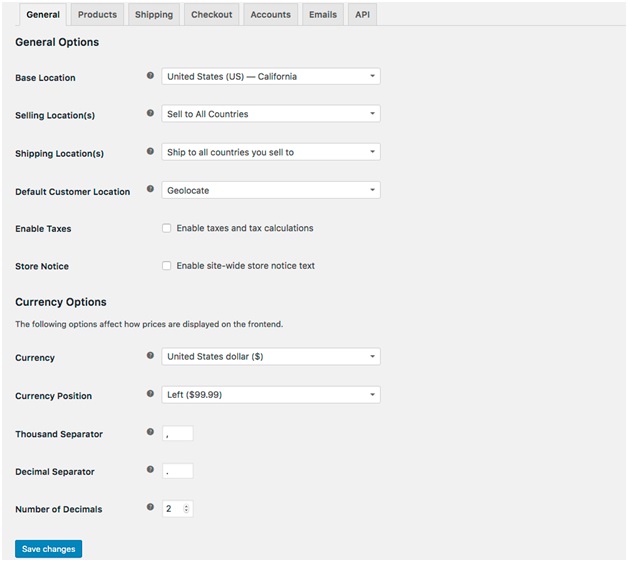
- Settings
Setting page is the heart of your store. It gives you all of the core options to change every major and minor detail of your site. You can change general settings, products, shipping, checkout, accounts, emails, contact forms, currency, API, location, and much more. You can check WooCommerce’s Help section to get a demonstration of each setting briefly.
- System Status
System Status page is full of useful data that updates you of the overall health of your WooCommerce WordPress eCommerce store. From webserver type to PHP limits, your WooCommerce version can get you everything at your convenience.
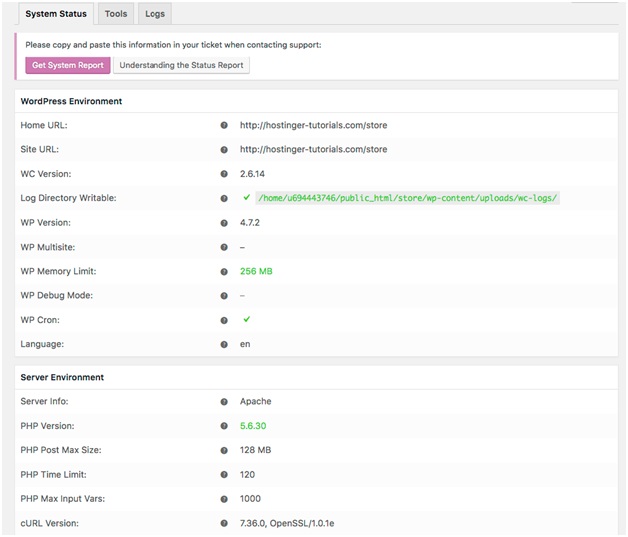
Get System Report button generates a detailed status report to provide for your hosting maintenance or support team. Tools section clears WooCommerce cache, rest user capabilities, and enable or disables debugging. Logs section retrieves logging files with relevant data of troubleshooting and debugging errors.
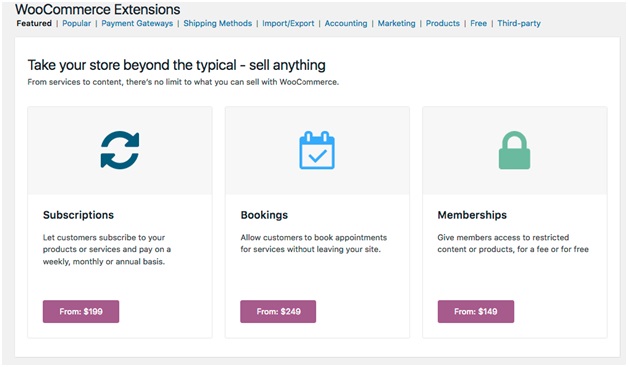
- Extensions
Extensions make WooCommerce adaptable and flexible. Just like other WordPress plugins, WooCommerce extensions can be installed from the store. Some of them are free, while some are premium. You can also synchronize WooCommerce with 3rd party services of your desire.
Step 5 – Customizing Your WooCommerce Store
“Deploying an eCommerce WooCommerce site in a default theme is not the best idea every time” says; Venn Spencer, Academist Help. As mentioned above, there is a wide array of customization options offered by WordPress to tailor your store’s appearance. Hence, go for a custom theme to attain maximum benefit for attracting and engaging customers. User experience can be improved with extensions. Fortunately, most of them are free while some of them cost you a reasonable cost.
- All-In-One Marketing Automation Platform for WooCommerce
Every store needs a marketing platform for email marketing, SMS and popups, Flashy is the perfect match when you looking for marketing automation for WooCommerce, it includes all channels and fully synced with WooCommerce – customers, orders and products.
- Changing WooCommerce theme
Just like every other WordPress site, WooCommerce site can also be made appealing by installing a beautiful and relative to your industry theme. There are thousands of available options from classic to modern look to get you a well-designed store. Just go to your admin dashboard and simply navigate ‘Appearance’->‘Themes’ and hit ‘Add New’ button to install a fresh theme.

- Installing WooCommerce Extensions
As mentioned in step 4, extensions are made to empower your WooCommerce site. There is a pile of additional useful features for WooCommerce that provides you with tons of extensions. The variety of extensions enhances the user experience by offering currency options, multiple languages, and analytical plugins. Go to your admin panel and select the Plugin option and press Add new. A list of useful plugins will be shown in front of you, select as per your requirement, and install them to make your site more interesting.
Conclusion
Undoubtedly, WooCommerce is a great tool to translate your eCommerce WordPress site to a fully-featured online store. Moreover, the best thing to work with WooCommerce is it doesn’t require you to be an expert in programming. Hopefully, the above article guides you well to help to set up and manage your WooCommerceWordPresseCommerce site.
Note: We have used add-product page of jaimelannister jacket of Premium Jackets to show the add-product, admin panel options, and other inside pages just to elaborate the integration process. This website is not for testing.